Indoor Searing Grill with Viewing Window & Temp Control
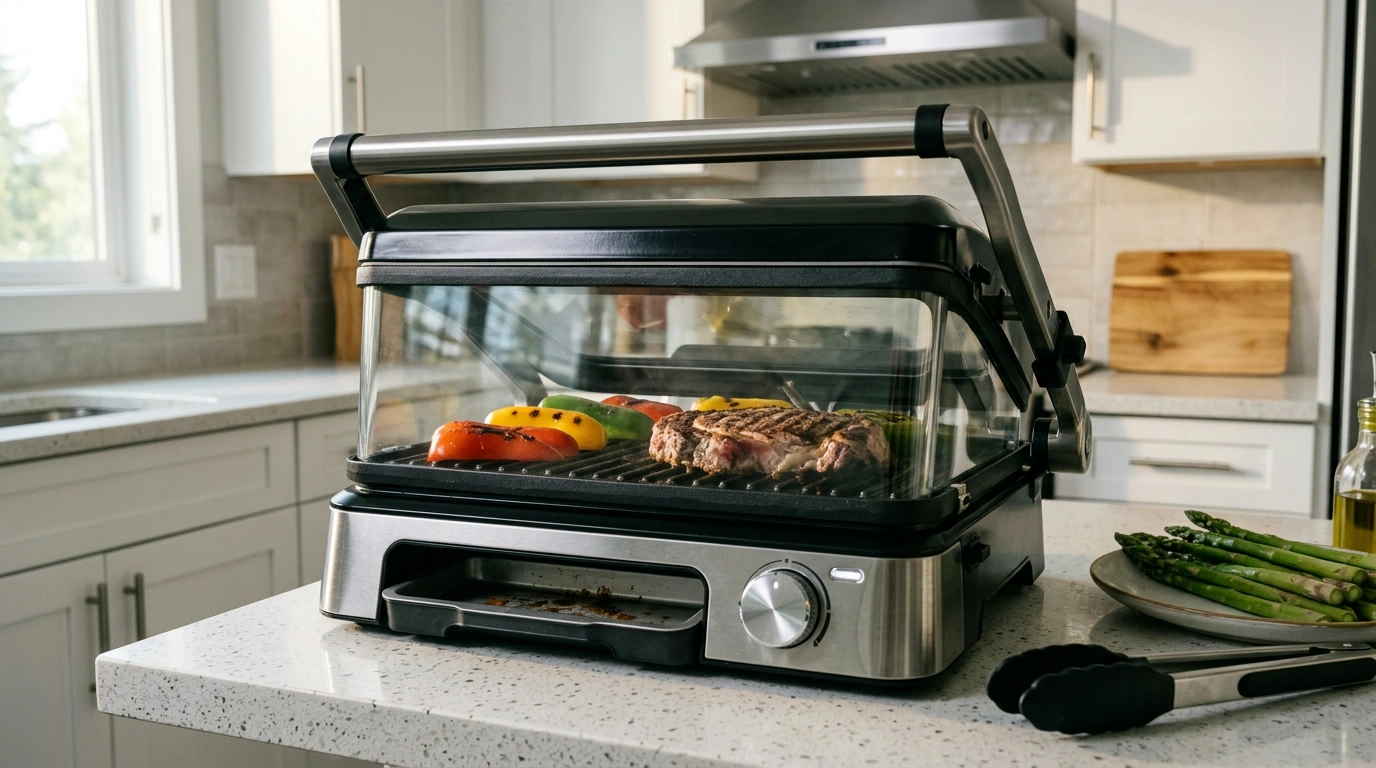
Electric Indoor Searing Grill with Viewing Window & Adjustable Temperature Control
Bring high-heat searing indoors without guesswork. This electric grill pairs a clear viewing window with adjustable temperature control to help lock in juices, build a flavorful crust, and keep an eye on doneness—ideal for steaks, burgers, chicken, vegetables, and quick weeknight meals.
What Makes an Indoor Searing Grill Different
A dedicated indoor searing grill is built to deliver the kind of intense, steady heat that drives browning—without the unpredictability of stovetop hot spots or the hassle of outdoor setups.
- High-heat capability supports browning and caramelization for steakhouse-style results.
- Electric heating delivers consistent power without an open flame, making it practical for apartments and small kitchens.
- A viewing window reduces lid lifting, helping maintain steady heat and faster cook times.
- Adjustable temperature control improves versatility for delicate foods (fish, vegetables) as well as thick cuts.
Key Features to Look For
Not all indoor grills behave the same at high heat. These are the details that tend to make the biggest day-to-day difference in results, smoke management, and cleanup.
- Viewing window: check color changes and surface browning without releasing heat.
- Temperature range and control: multiple heat levels for sear, roast, and gentle cooking.
- Heat retention and recovery: stable temperature after adding cold food improves sear quality.
- Grease management: drip tray and drainage design help reduce smoke and keep countertops cleaner.
- Cooking surface: nonstick or easy-release surfaces simplify flipping and cleanup.
- Footprint and storage: consider countertop space and whether parts fit in a dishwasher or cabinet.
At-a-Glance: What This Grill Is Best For
- Best for: steaks, chops, burgers, chicken thighs, skewers, asparagus, peppers, and quick panini-style grilling.
- Great when: outdoor grilling isn’t available, weather is poor, or faster preheating is needed.
- Not ideal when: cooking very large batches at once or achieving heavy wood-smoke flavor is the top priority.
Indoor Searing Grill Use-Cases and Recommended Settings
| Food | Goal | Suggested Heat Level | Window Checkpoints |
|---|---|---|---|
| Steak (1–1.5 in.) | Deep sear + medium-rare center | High to start, then reduce slightly | Look for dark browning before first flip; check surface moisture drying out |
| Burgers | Browning without overcooking | Medium-high | Watch for edge color change and rendered fat pooling |
| Chicken (boneless) | Even browning + safe internal temp | Medium | Look for golden surface; reduce heat if sugars/spices darken too fast |
| Vegetables | Char marks + tender bite | Medium-high | Watch for blistering; pull when color is vibrant and lightly charred |
How to Get a Better Sear Indoors
The best indoor sear comes from heat management and moisture control. A few small habits can noticeably improve crust, reduce steaming, and make timing more predictable.
- Preheat fully: allow the grill to reach target temperature before adding food for better browning.
- Dry the surface: pat proteins dry; excess moisture steams instead of sears.
- Use oil strategically: lightly coat food rather than flooding the grill to limit smoke.
- Avoid overcrowding: leave space so heat can circulate and surfaces brown evenly.
- Flip with purpose: wait for release and visible crust formation; frequent flipping can reduce browning.
- Finish by temperature: use an instant-read thermometer for accuracy instead of relying on time alone.
For food safety guidance on internal temperatures, use reputable references like the USDA safe minimum internal temperature chart and the FDA food thermometer tips.
Smoke, Odor, and Kitchen Comfort Tips
High-heat cooking can create smoke indoors, but the biggest contributors are usually oil choice, accumulated grease, and sugary marinades at searing temperatures.
- Choose higher-smoke-point oils (avocado, refined canola) for high-heat cooking.
- Trim excess fat from steaks and chicken skin to reduce flare-like smoking on hot surfaces.
- Use ventilation: range hood on high, nearby window open, or a small fan moving air away from the grill.
- Keep the drip tray clean; built-up grease is a common source of extra smoke.
- For sugary marinades, start at a lower temperature and raise heat near the end to prevent burning.
Cleaning and Care That Keeps Performance Consistent
A grill that heats evenly and releases food well is usually a grill that’s cleaned consistently. A few minutes after cooking can prevent stubborn buildup later.
- Let the grill cool safely before cleaning to protect coatings and avoid warping components.
- Wipe while warm (not hot) for easier removal of browned bits.
- Empty and wash the drip tray after each use to prevent odors and smoke.
- Use non-abrasive tools to protect nonstick surfaces and keep food release smooth over time.
- Store with the lid closed to reduce dust on the cooking surface and window.
Who This Grill Fits Best
Product Options In Stock
- Electric Indoor Searing Grill with Viewing Window & Adjustable Temperature Control ($103.47, in stock): designed for high-heat indoor grilling with visual monitoring and flexible temperature settings.
- Compact 400W Mini Juicer with 16oz Cup ($81.82, in stock): an easy way to add fresh juice to breakfast or to pair with grilled lunches and dinners.
FAQ
What temperature should food reach for safe eating when using an indoor grill?
Use an instant-read food thermometer and follow safe minimum internal temperatures. USDA guidance commonly used is 165°F for poultry, 160°F for ground meats, and 145°F for many whole cuts with a rest period for best results.
Does the viewing window reduce cooking time?
It can, because checking doneness through the window reduces lid lifting, which helps the grill maintain heat and recover faster. Actual time savings depend on food thickness and how cold the food is when it hits the grill.
How can smoke be reduced when searing indoors?
Preheat properly, use a higher-smoke-point oil, trim excess fat, and keep the drip tray clean. Strong ventilation and lowering heat for sugary marinades (then finishing hotter near the end) also help reduce smoke.










Leave a comment